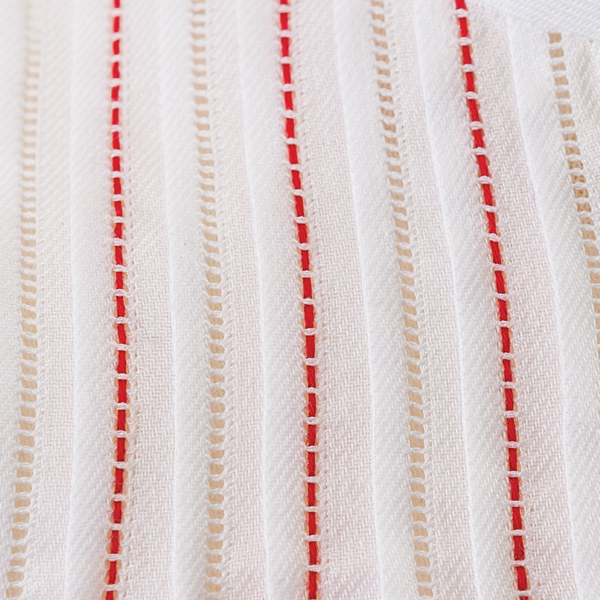
Hemstitching is defined as the decorative bundling of a group of threads on an even weave fabric where part of the ground has been removed.
As featured in Baby’s First Christmas, Classic Sewing Holiday 2016 Issue
Downloadable File:
Stitch Library – Hem Stitching – PDF
SUPPLIES:
Even weave fabric
Needle compatible with thread
(#26 or #28 tapestry)
Thread slightly smaller than your even
weave fabric (1 strand of floss or machine
sewing thread)

 If you are hemstitching a hem, baste your hem in one or two threads below the withdrawn area. Remove those basting threads as you progress with your hemstitching.
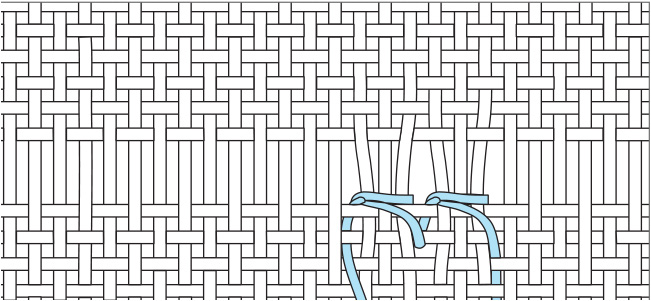
 4. Anchor your bundling stitch by taking a tacking or anchor stitch straight up and down (needle pointing down). This stitch falls to the left of your first bundle and needs to go down into your fabric 2 threads below the withdrawn area. (Very fine fabrics call for anchoring 3 threads.) If you are hemstitching a hem, be sure to just catch the hem below the fold with your anchor stitches.

 Right Side
 2. Stitch several hemstitches over the top of the new thread (at least 5 – 7 stitches). Your anchor stitches will hold your new thread down. Make sure to end your stitching with an anchor stitch.
 3. Thread your needle with your newly secured thread being careful not to pull it out from under any previous stitches. Stitch again over the last anchor stitch with your new thread.


 Right Side