NOTE: If you’re just now joining us for the Flower Power Sew-Along, please click here to sign up for the sew-along. When you sign up, you’ll receive the downloadable patterns and you’ll be entered for a chance to win a HUSQVARNA® VIKING® EPIC™ 980Q Sewing Machine.
Previous lessons are available here: Lesson 1 and Lesson 2
FLOWER POWER SEW-ALONG LESSON 3
PRESENTED BY HUSQVARNA® VIKING® & CLASSIC SEWING MAGAZINE
DESIGNED BY ALICIA WELCHER, Assistant Editor, Classic Sewing Magazine
Click here for a printable version of this lesson.
Welcome to Week 3 of our Sew-Along! This week, we will be creating and attaching the French bias piping to the neckline and armholes of the sleeveless top. If you haven’t tried this technique for finishing an opening, you are going to love it! We will also create the piping for the rest of the project.
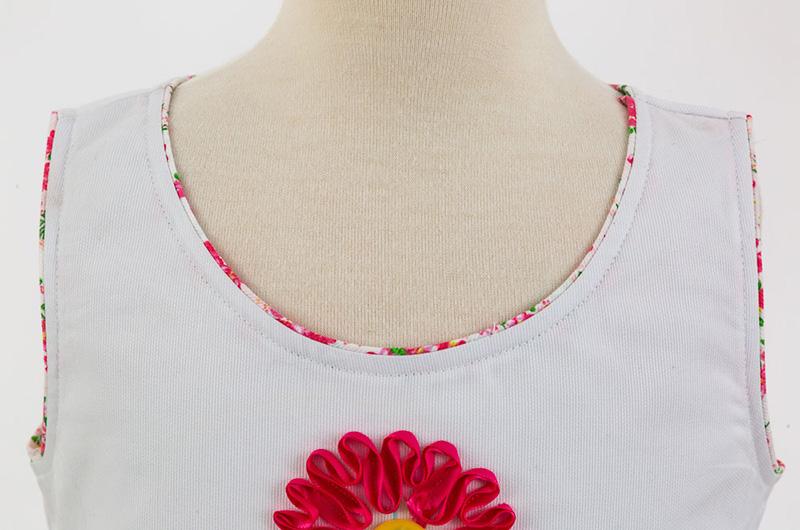 FRENCH BIAS PIPING—NECKLINE AND ARMHOLES
1. If using a lining, place the front/back linings to the wrong side of the front/ back and treat as one.
2. Place the front to the back, right sides together, and stitch one shoulder seam.
3. Measure neckline and armholes.
Neckline: ______
Armholes: ______
4. Cut enough 2″ wide bias strips to cover the neckline and both armholes.
5. Sew 2″ wide bias strips together so that you have one piece at least 2″ longer than the neckline and two pieces 2″ longer than the armhole. Or sew one long piece and cut as needed. The easiest way to do this is by using the Laser Sewing Guidance feature.
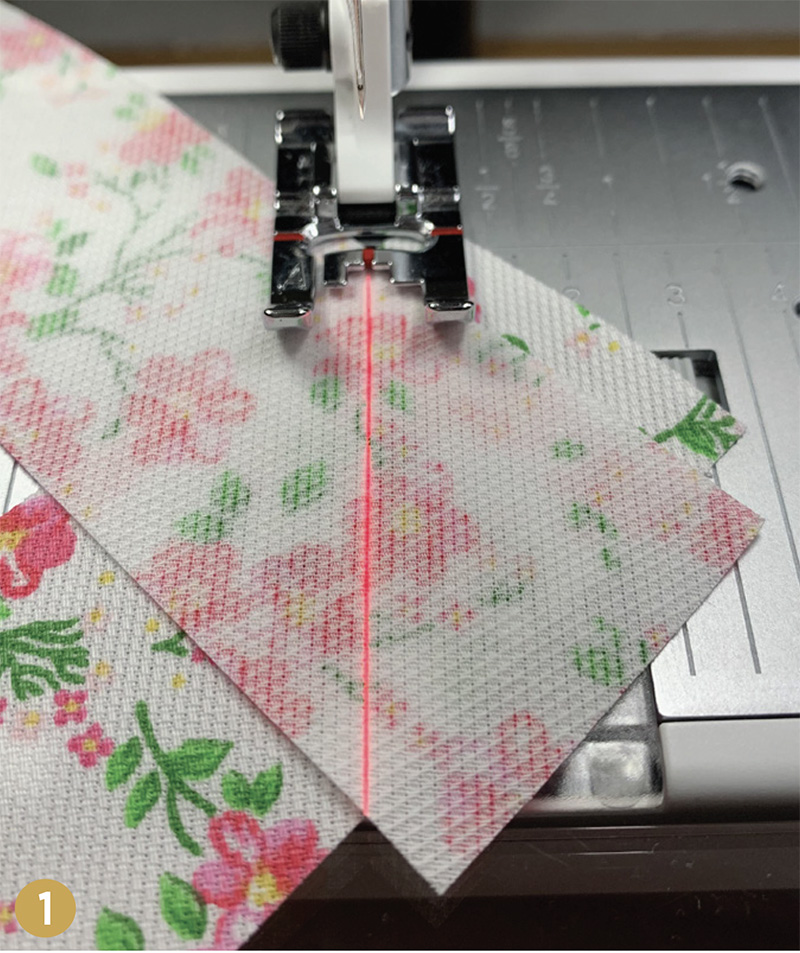
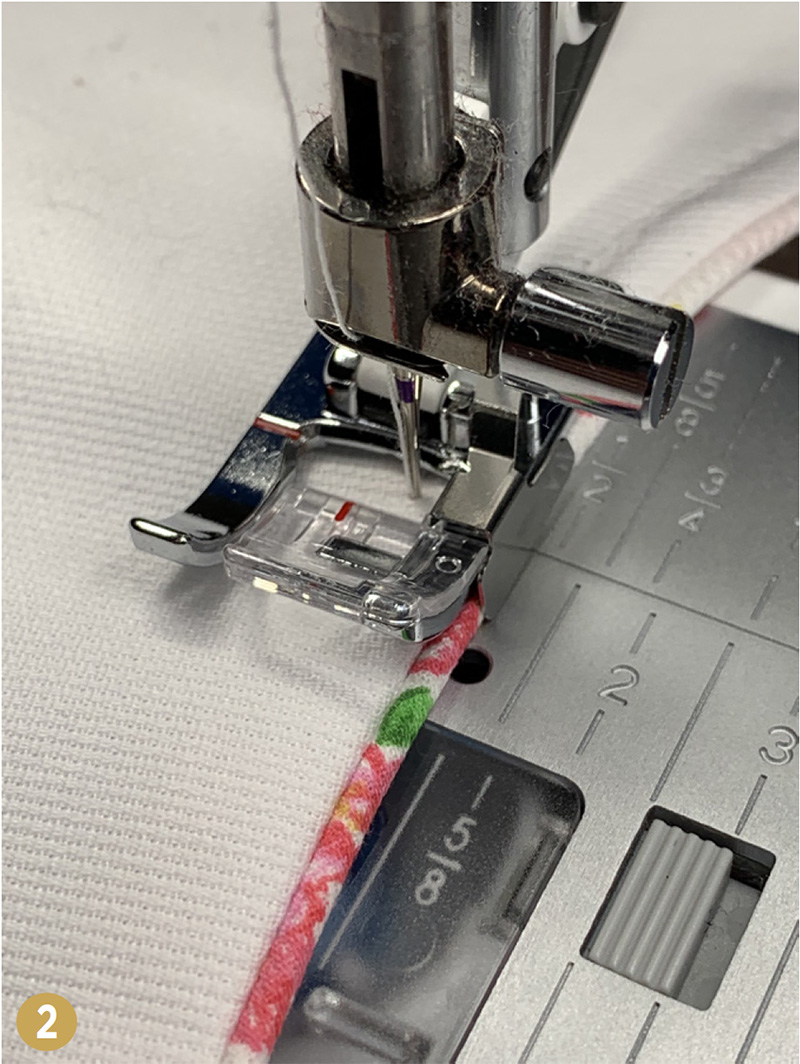
a. Set the machine for a center straight stitch and activate the Laser Sewing Guidance. Check to be sure that the laser is set to a needle position of 0 on the screen. This ensures that the laser is directly in front of the needle.
b. Place two bias strips right sides together on one short end with one strip perpendicular to the other.
c. Place fabrics under the foot so that the needle will start in one overlapping corner and the laser intersects the other overlapping corner (Photo 1). Stitch, keeping the laser focused on the intersection.
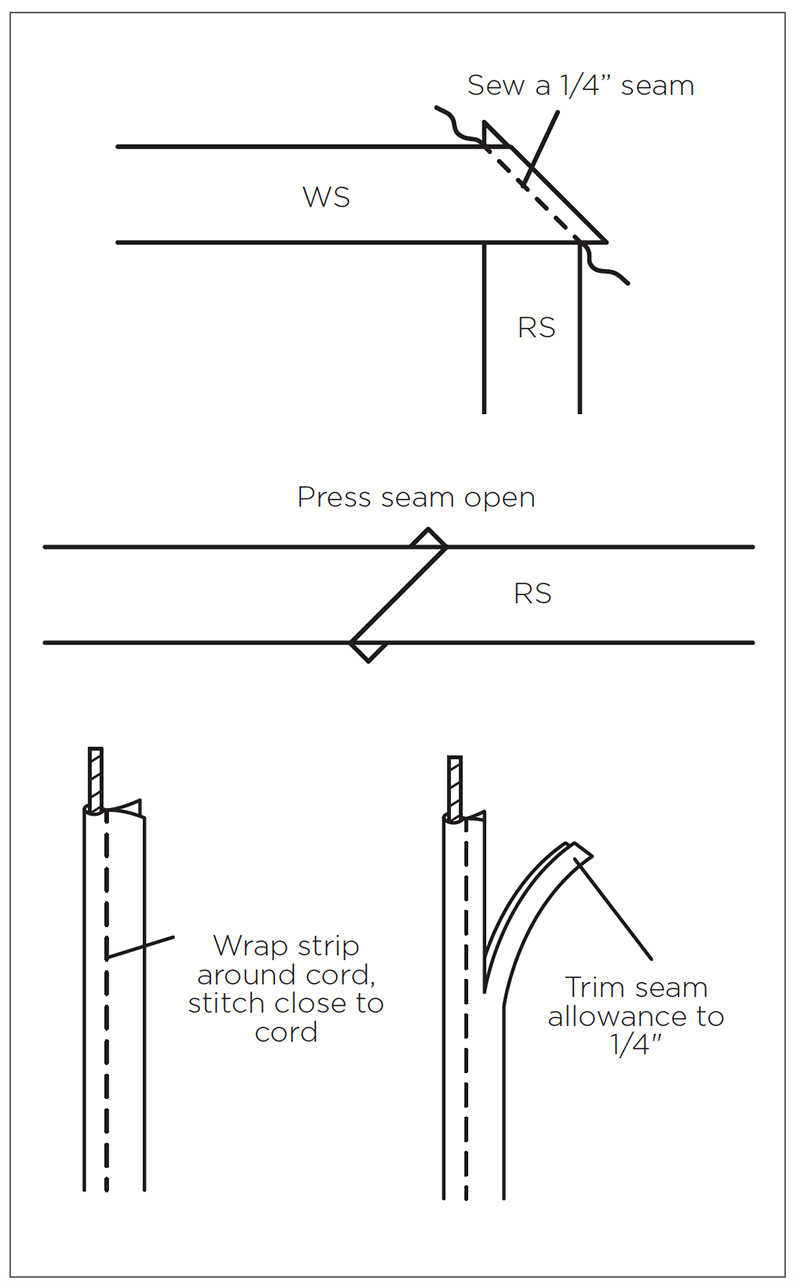
 d. Trim the seam allowance to 1/4″ and press open.
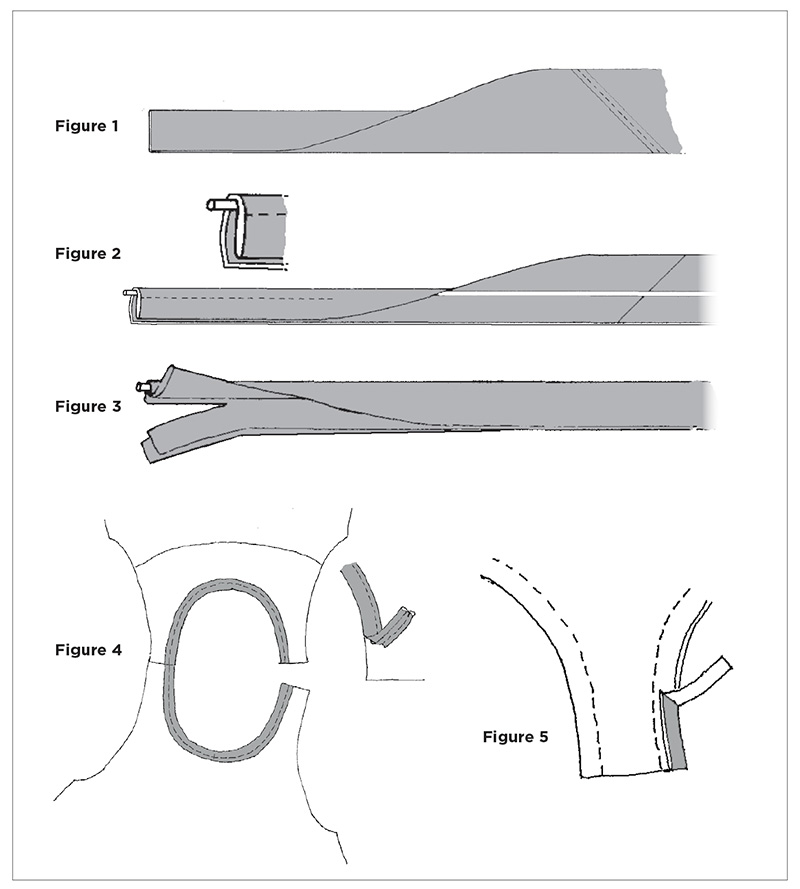
6. Fold the bias strip(s) in half lengthwise, wrong sides together, to measure 1″ wide (fig. 1). Press.
 7. Attach the mini piping foot and disengage the IDF.
8. Lay the baby piping cord down the center of the folded bias and fold the bias over the cord.
9. Stitch, keeping the cord in groove and aligning the fold of the bias with the two raw edges of the bias (fig. 2).
10. Trim the two raw edges of the bias 1⁄8” away from the stitching. Do not trim the folded edge (fig. 3).
11. Place the piping to the neckline, wrong (trimmed) side of piping to right side of top allowing 1/2″ to extend from the shoulder opening.
12. Stitch the piping to the neckline and trim excess piping even with the shoulder opening at the end. Trim the piping even with the shoulder opening at the beginning (fig. 4).
13. Trim garment seam allowance of the top even with the trimmed side of the piping (fig. 5).
14. Fold the bias to the wrong side of the garment so that the piping is at the uppermost edge of the garment. The trimmed raw edges of the piping will be sandwiched between the garment and the folded bias (fig. 6).
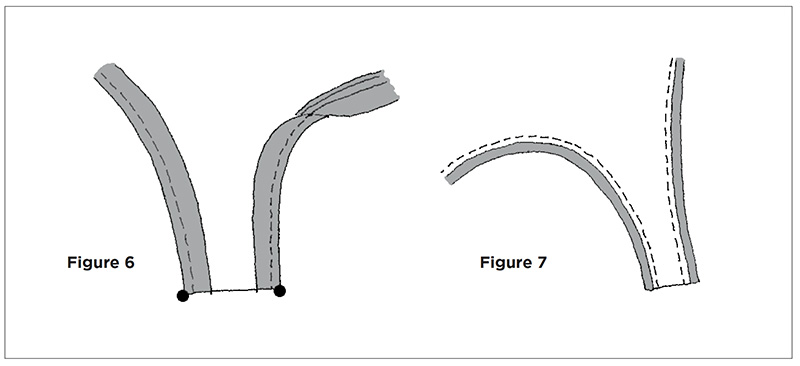 15. Straight stitch through the garment and the bias a generous 1⁄8” away from the seamline of the piping (fig. 7). When the folded edge of the bias is lifted from the garment, no raw edges should show.
Tip: To get even topstitching around the neckline and armholes, use an Edge-Stitching foot for IDF and engage IDF. Set the machine for a 1/4″ seam (Stitch D:1). Align the piping against the inside edge of the flange of the foot and stitch. The 1/4″ will include approximately 1⁄8” of piping and an additional 1⁄8” of the top (Photo 2).
 16. Sew the remaining shoulder seam and repeat steps 8 through 15 for each armhole.
PIPING—BAND EMBELLISHMENT
1. For each garment that you are making, measure the following to determine the amount of piping needed:
a. For the top, measure the top of the front and back bands.
Front Band + Back Band = ______
b. For the pants, measure the bottom of the front and back legs.
Front Leg + Back Leg = ___ x 2 = __
c. For the skirt, measure the top of the front and back bands.
Front Band + Back Band = ______
2. Create the needed amount of piping using 1-1/2″ bias strips and baby piping cord. Refer to steps 5a through 5d for tips on using the Laser Sewing Guidance to sew the bias strips together.
3. Use a piping trimming ruler to trim seam allowance of the piping to 1/4″.
Join us next Wednesday, May 20, for lesson 4 of the Flower Power Sew-Along!


